How do I track attendance and justify absences?
Teaching & Student Management
Teacher
Managing student attendance is a critical part of any school’s daily operations. It helps to know who is present, who is absent, and why. In this guide, you’ll learn how to use AcademIQ to record attendance and add reasons for absences to keep student records clear and up to date.
In this article
Click on a link below to jump to each section
In this article
Click on a link below to jump to each section
Viewing Attendance Records
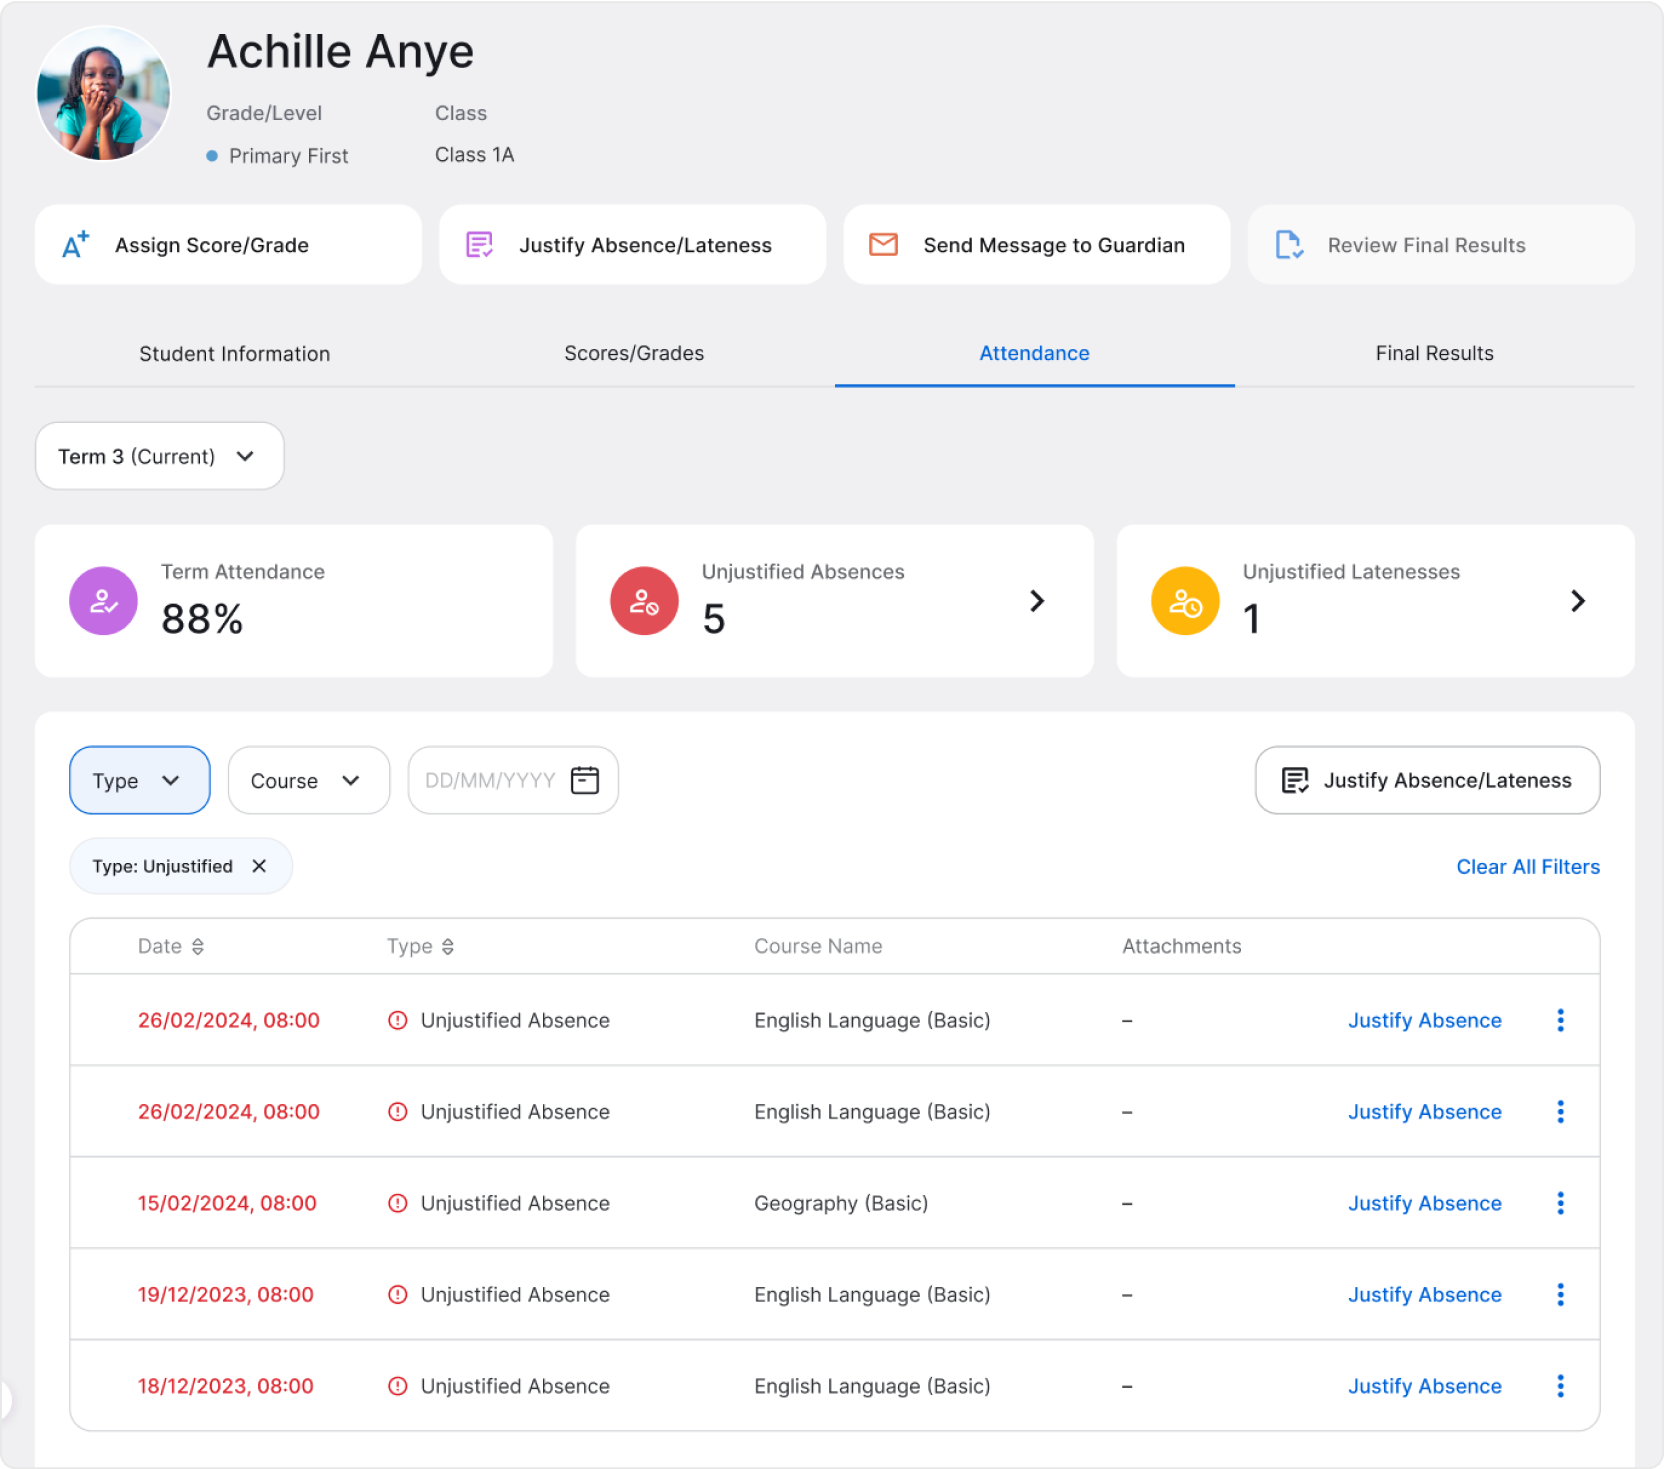
Just like for scores/grades, attendance can be managed for one student, directly from their profile or for a class, from the Class Page, either way it can be found in the Attendance tab. You can also view attendance records for all students you teach in the Attendance section on the left side menu.
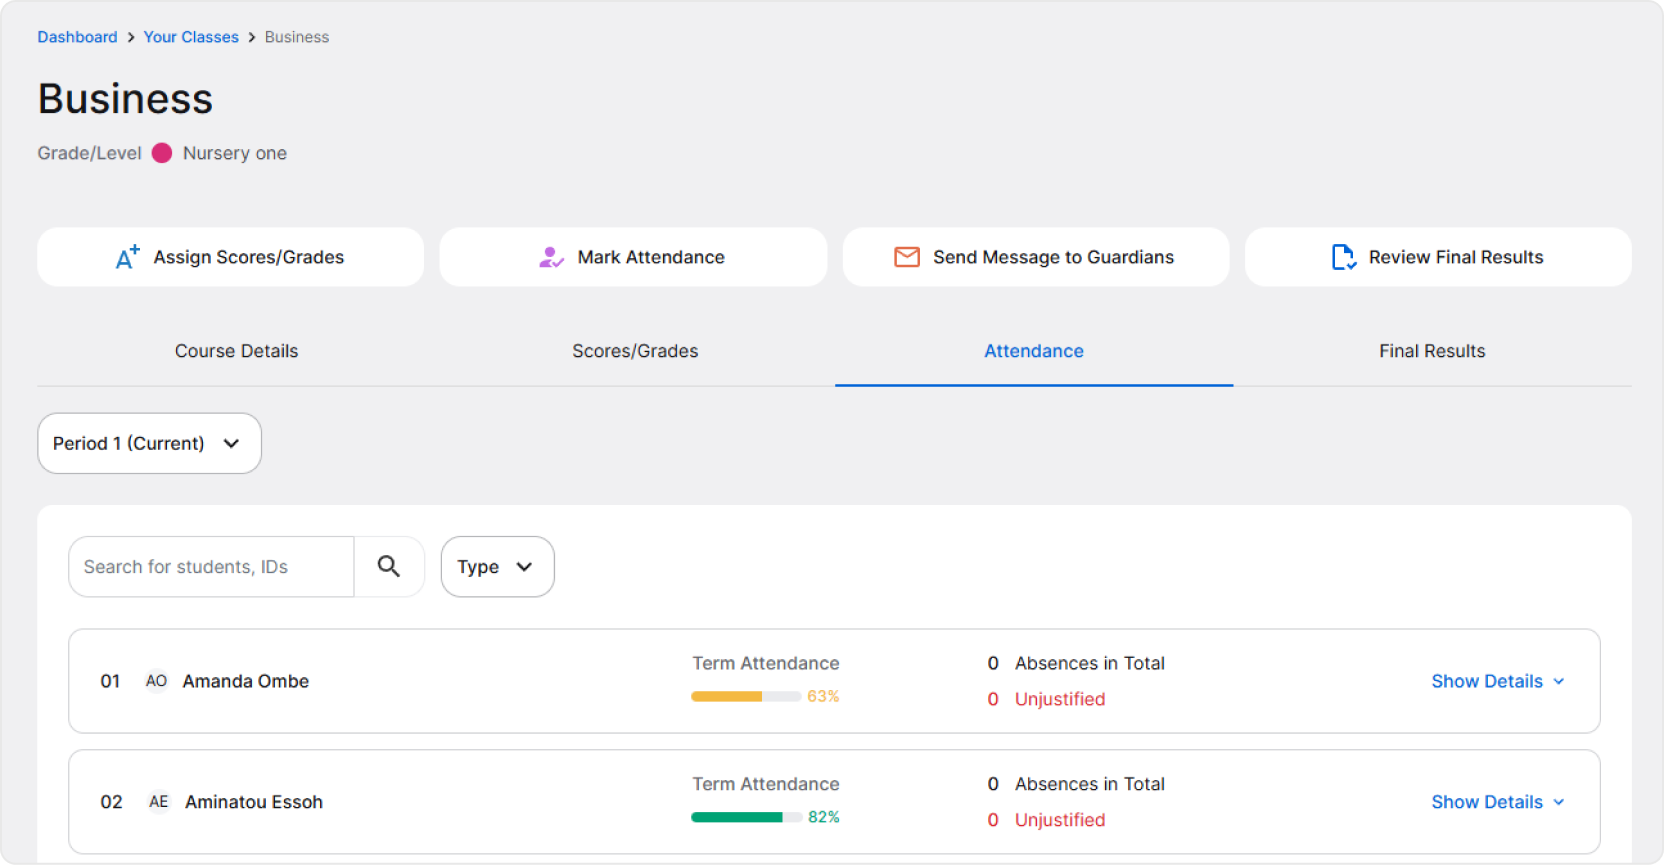
The attendance summary is simple, for each student you’ll see a total attendance for the current (or selected) term. It’s a percentage value calculated based on the amount of absences a student has.
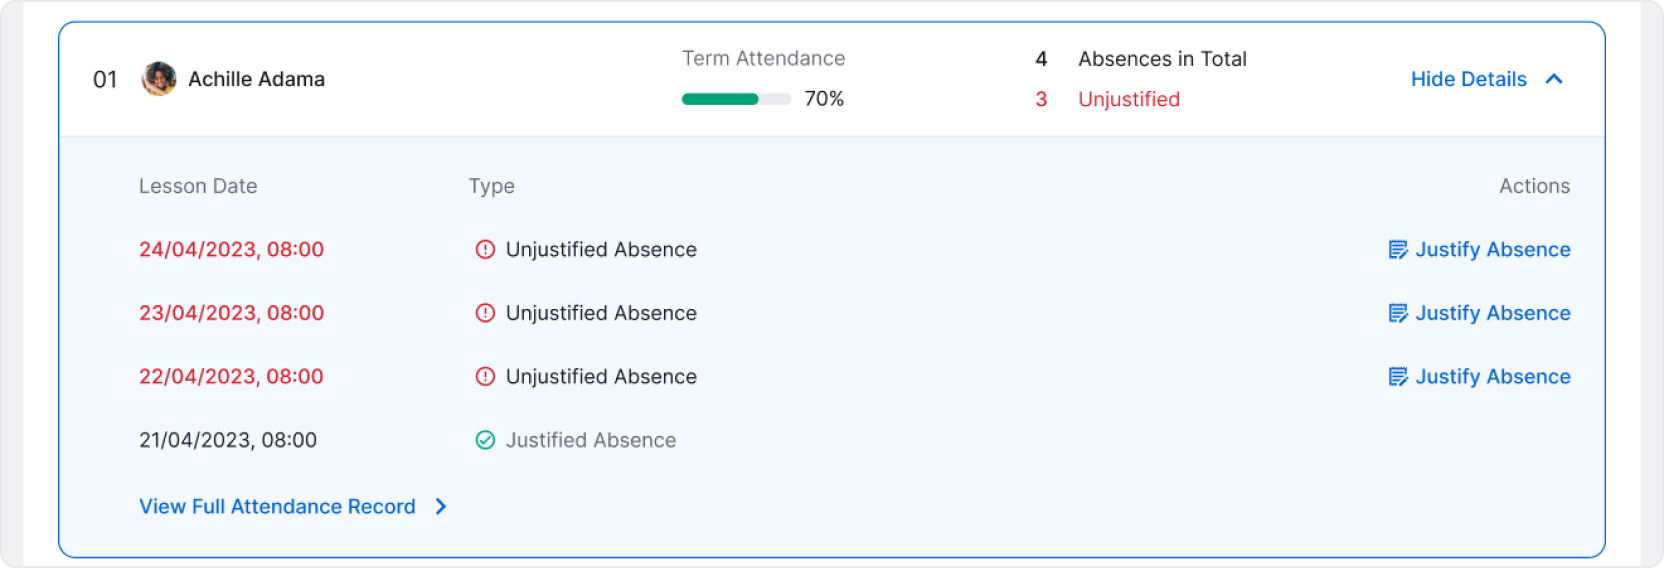
What you’ll see on the Class Page is an overall summary of attendance for all students in the Class. To have a detailed view, click Show Details on a student’s card to reveal the last four records for the student. Click View Full Attendance Record to go to the student’s profile and access the full attendance record.
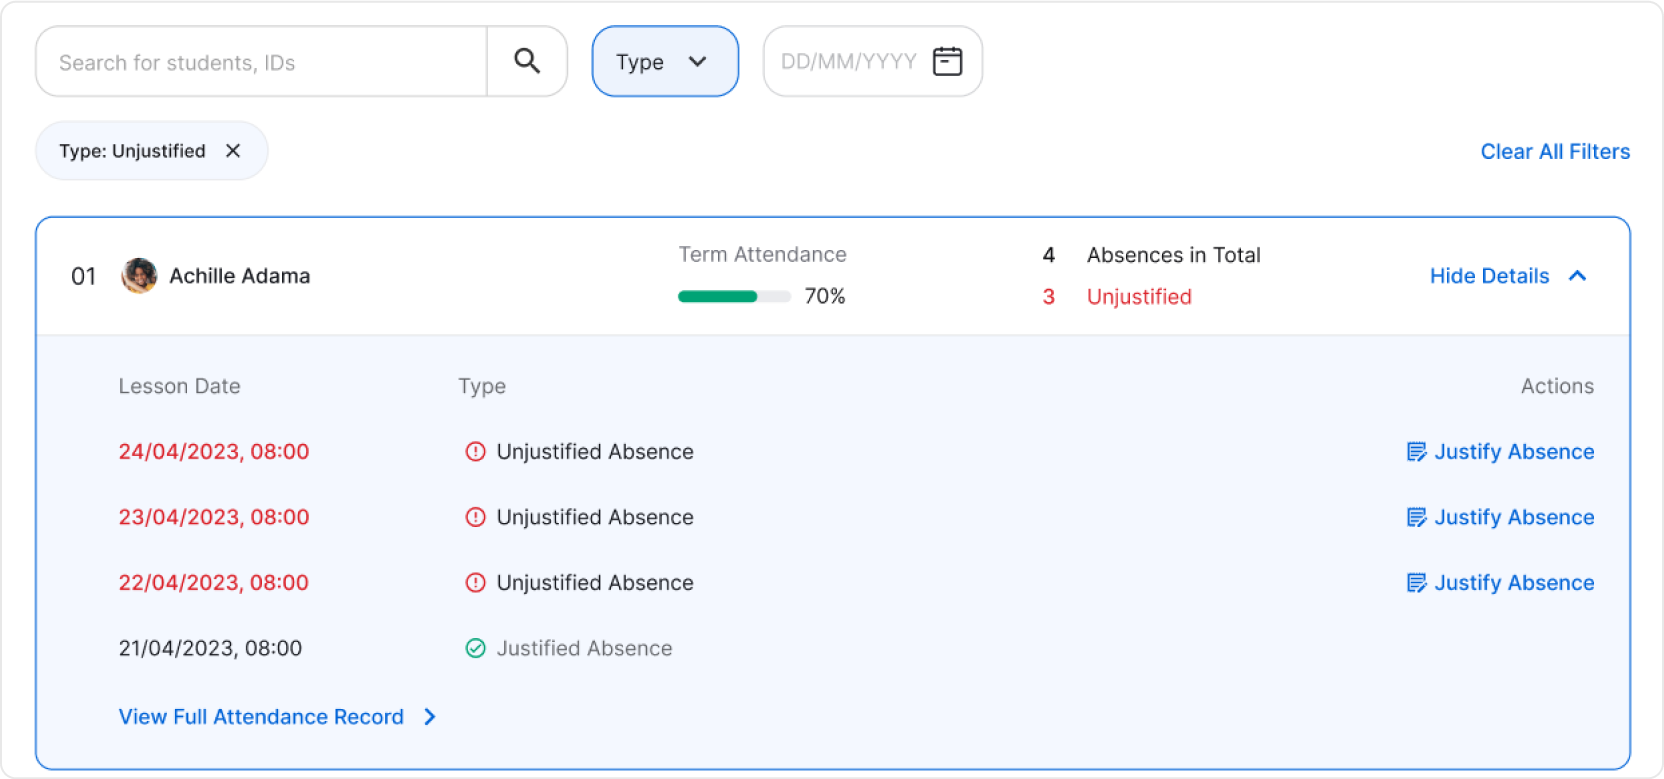
On the student’s profile, you’re able to filter the attendance records to show only absences, latenesses, or presences. Additionally, you can choose to show only unjustified records that might need action.
Marking Attendance
Attendance is marked for all lessons based on the schedule. It becomes available once a lesson begins. You can start marking attendance in multiple ways:
- Directly from your teacher dashboard. From the calendar card on the right, you’ll see upcoming classes. Click on a class to navigate to the Class Page from where you can mark attendance
- Attendance tab on the left-side menu. At the top of the page, you’ll find Lessons with Unrecorded Attendance.
- Your Classes tab on the left-side menu. Find the class you want to mark attendance for and click on it to go to the Class Page.
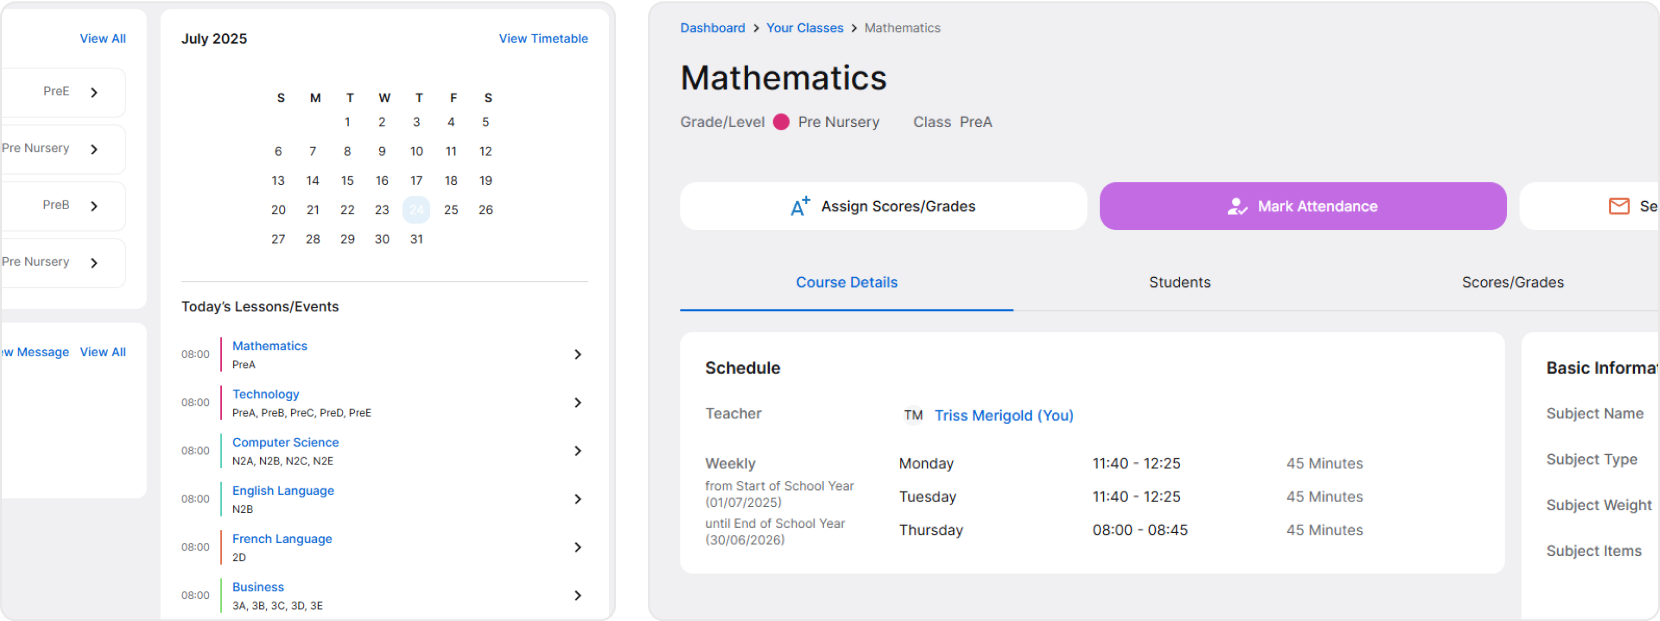
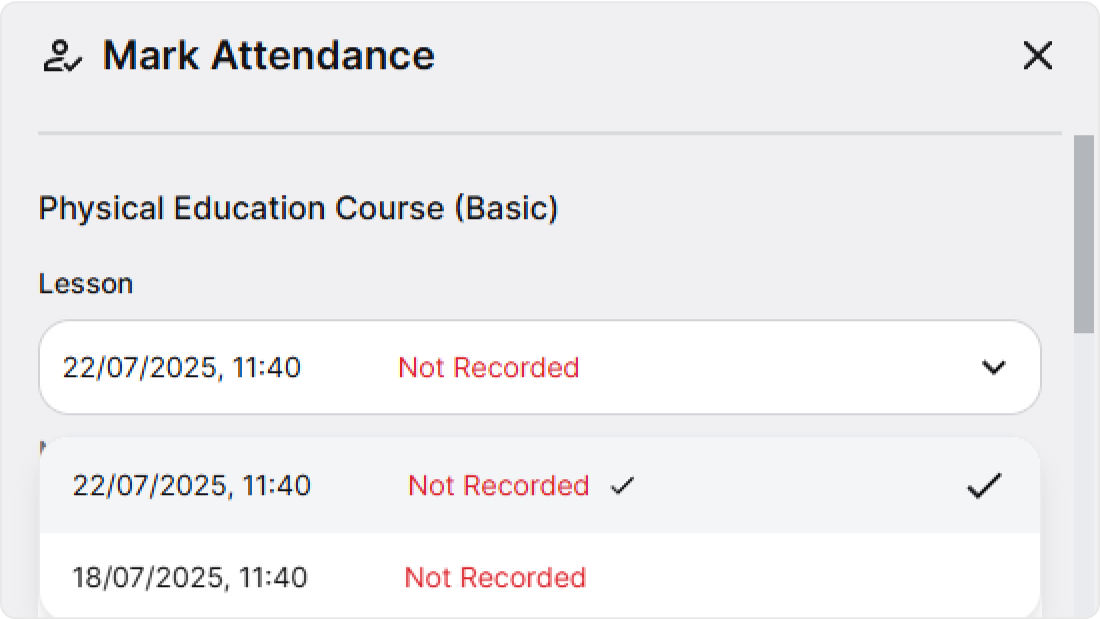
When you click Mark Attendance, a pop-up will open. You’ll find the name of the class on top and a lesson selection right below if there is more than one lesson with unrecorded or incomplete attendance. The most recent lesson will always be selected by default.
Right below the lesson selection, you’ll see the list of students in the class. Next to each of them, you’ll have three buttons – present, absent, and late. Click the button that reflects the student’s attendance status.
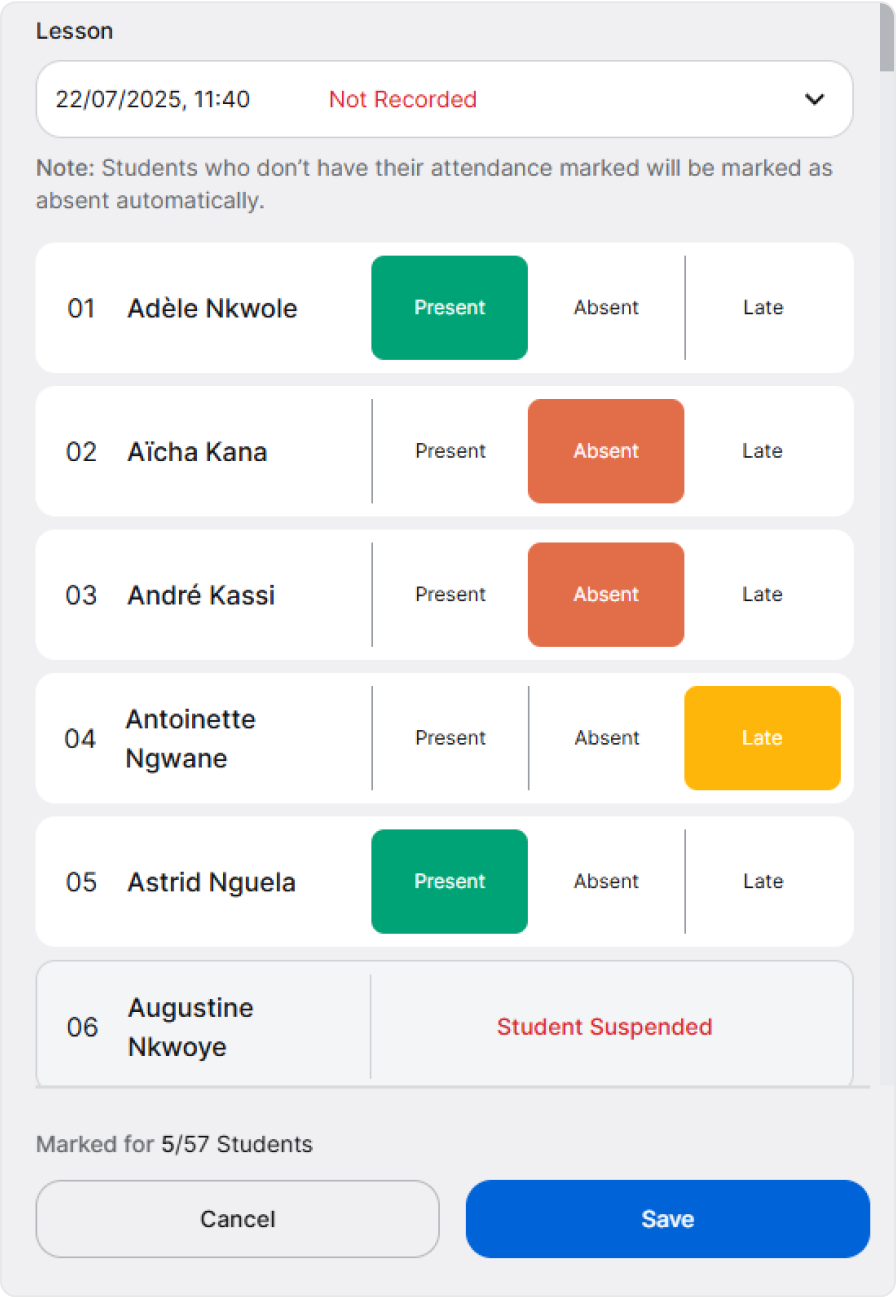
When finished, simply click Save and everything will be saved and marking attendance completed.
❗ If you save and finish without marking attendance for a student, they will be marked as absent automatically.
Marking Attendance by Scanning QR Codes
If you’re using AcademIQ on your phone, you’ll be able to mark attendance by scanning students’ QR codes. Each student has a QR code on their ID (identification) card. The code carries information about the student’s name, class, school year, grade/level, and status (for example: active or suspended).
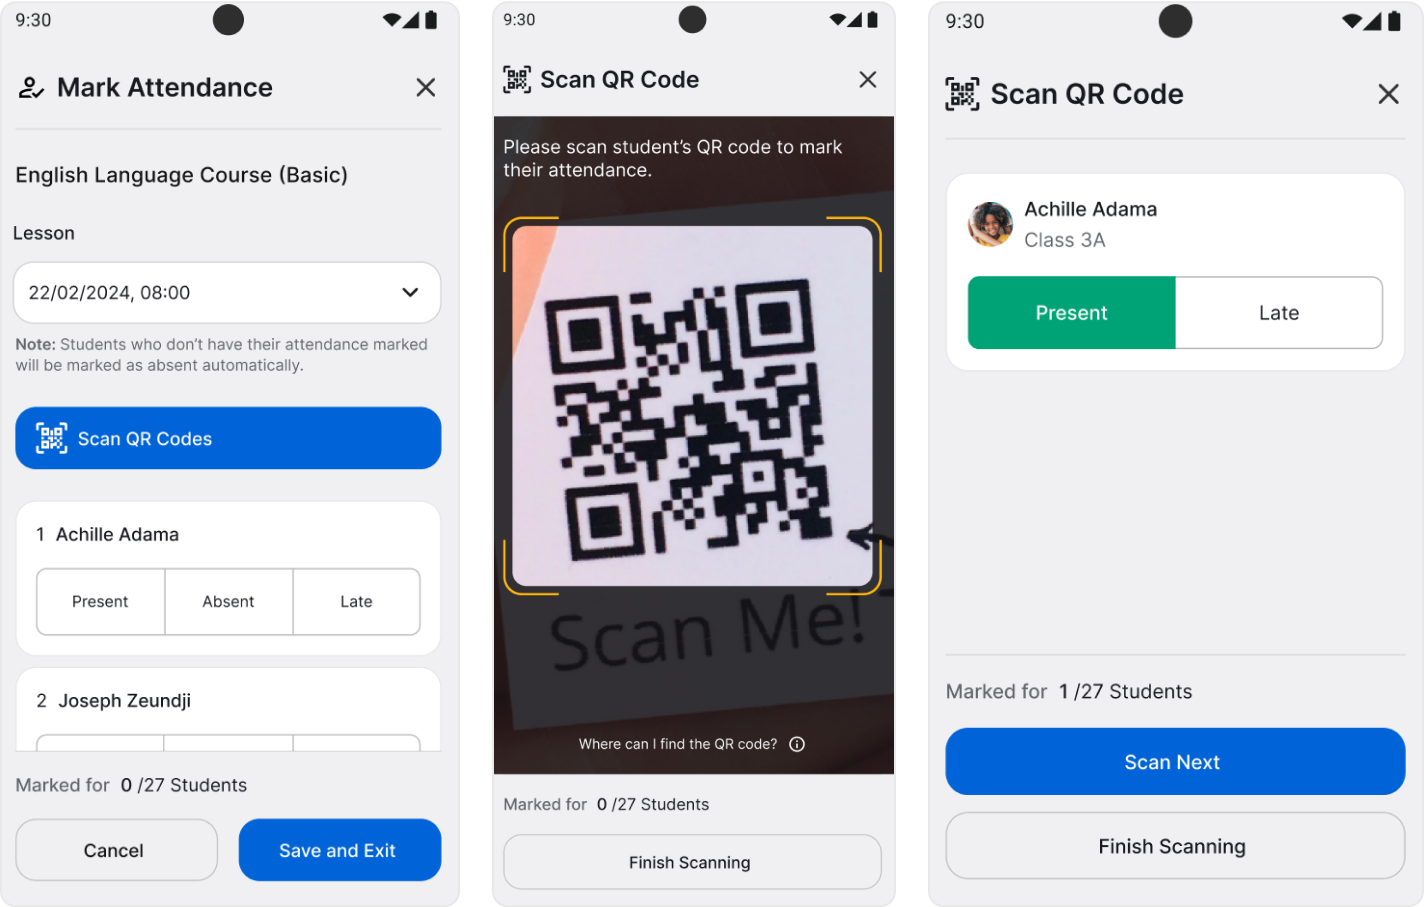
When you tap Scan QR Codes, you’ll see your camera view and you can scan the first student’s QR code by directing your phone’s camera to fit it in the framed area. Then, the app will automatically read the student’s information and show them to you on the screen, with a Present status selected. All you need to do is click Scan Next and repeat the steps with the next student.
The app will inform you if the student is suspended, from a wrong class, or if their identification card is invalid.
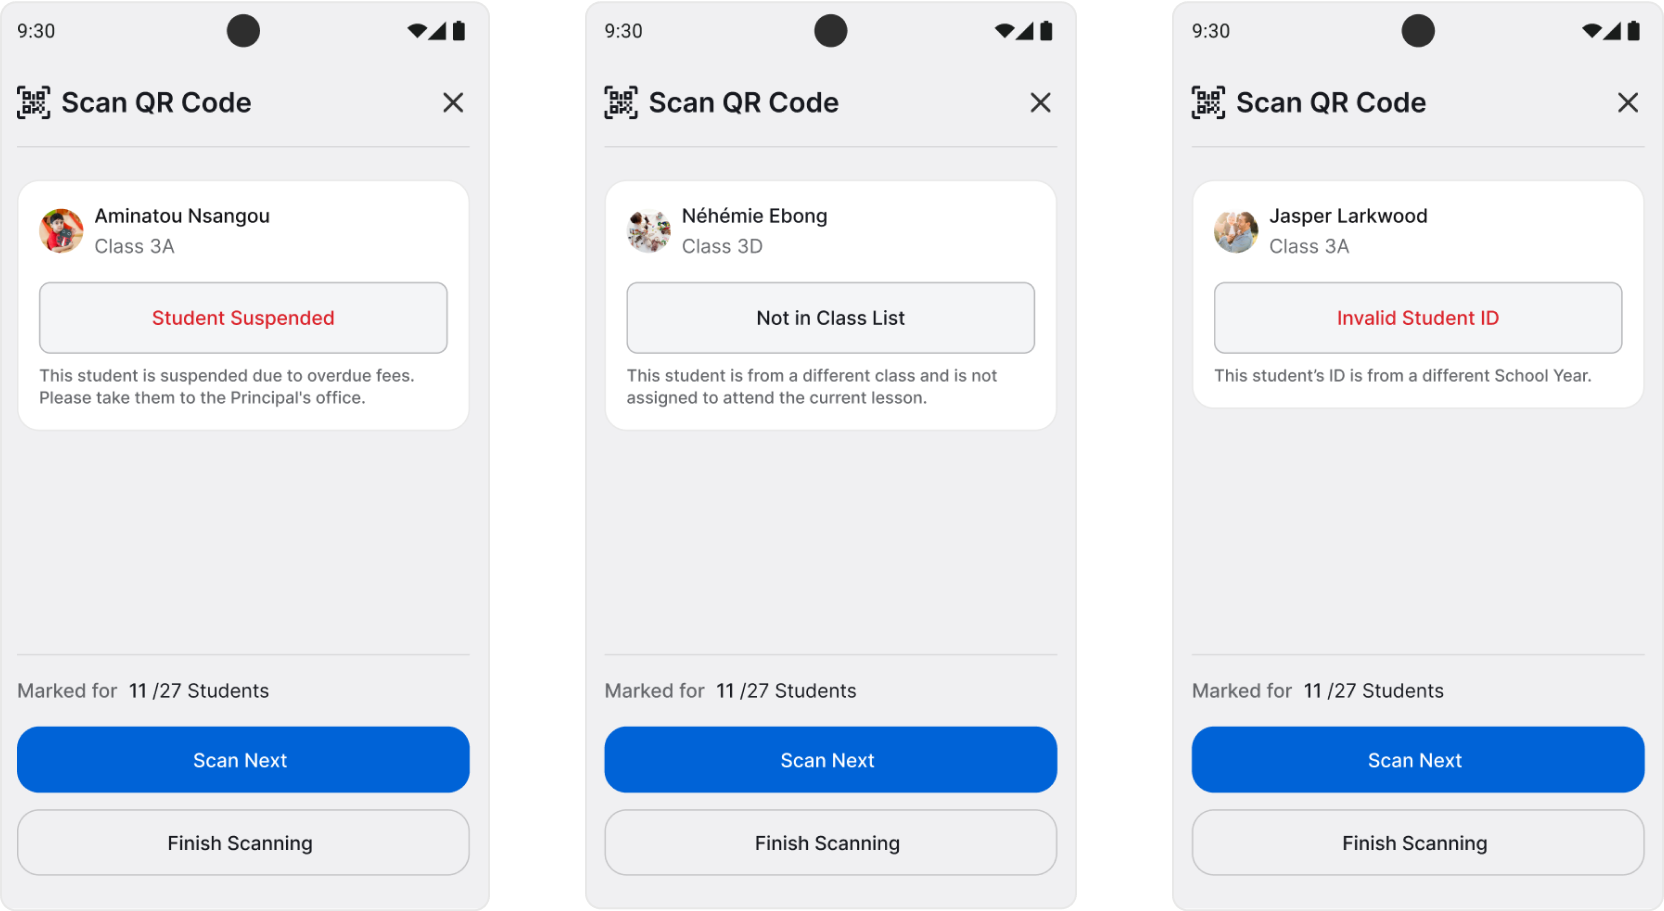
💡 Attendance can’t be recorded for suspended students, students from a wrong class or with an invalid identification card.
💡 When scanning QR codes, you’ll scan only present students’ ID cards. Students that are on the class list, but whose QR codes were not scanned, will be automatically marked as absent. You don’t need to perform any additional action or mark their absence manually.
When you scanned all of the students’ IDs, tap Finish Scanning to finish the process. You’ll be brought back to the marking attendance screen. You can review the records or make any manual changes here or tap Save and Exit when you’re done.
Justifying Absences
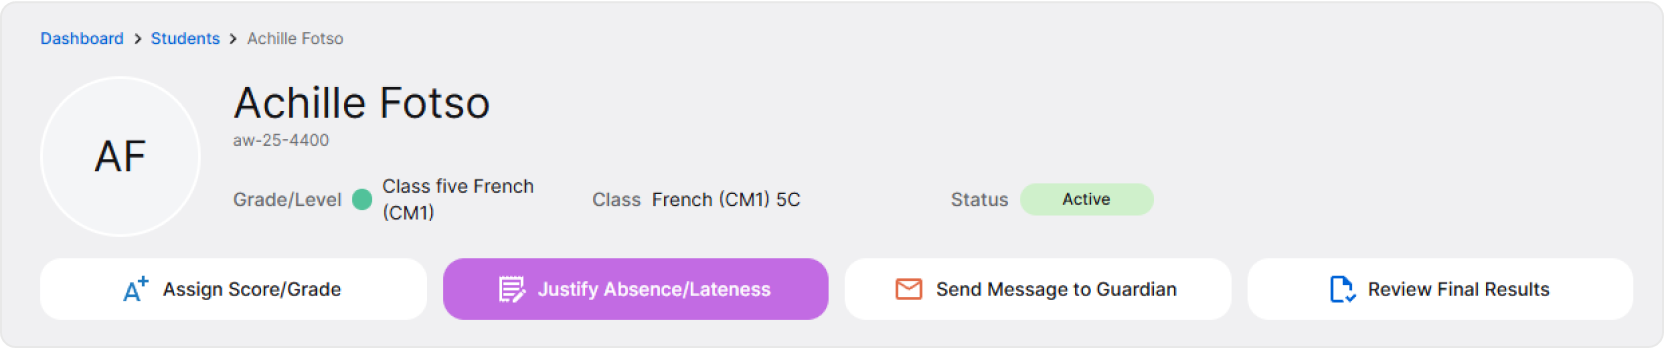
When a student is absent, you can add a justification for their absence. Find the Justify Absence/Lateness button on a Student’s Profile, or justify a selected absence from the Attendance tab.
A pop-up will open. First, select if you’d like to justify absence for one, chosen lesson or from all lessons within a time period.
🖋️ For example, if a student’s been sick for two weeks, you can justify absences for all lessons within the two weeks to make the process faster. You don’t have to justify absences for each of the lessons separately.
Then, choose the date and lesson. Optionally, you can add a note and upload a file or photo if a parent/guardian provided a justification proof.
Finish by clicking Add Justification.
💡 Guardians can justify their child’s absences too.
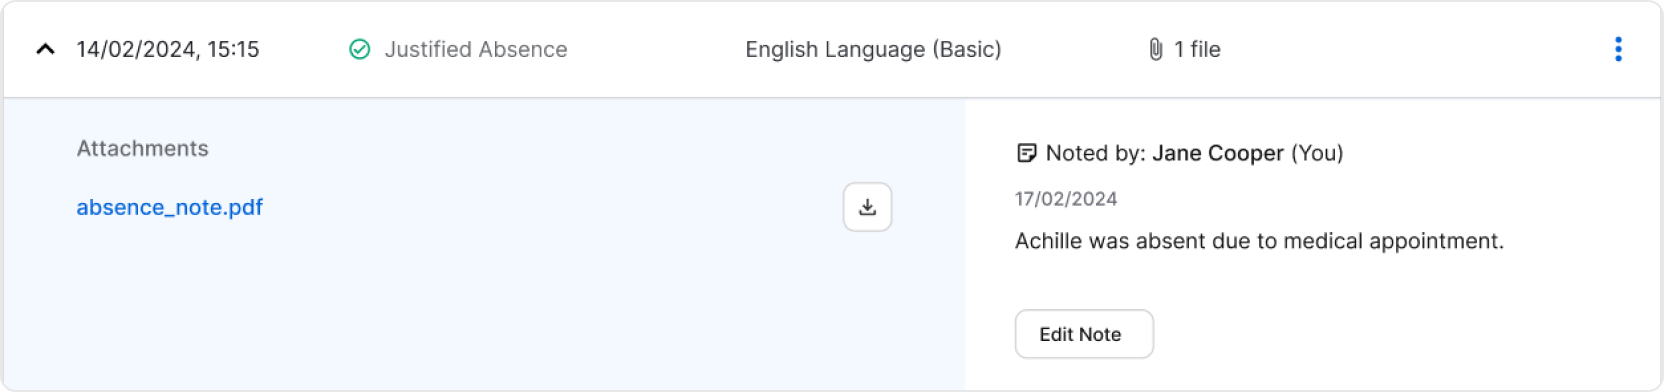
Justified absences can be viewed in the attendance records table. Additionally, by clicking on the arrow on the far left, you’ll be able to expand the row and view details, such as uploaded files and notes.
A justification can always be modified or removed.